VPN
OpenVPN
OpenVPN is open-source software that can be used to access the Internet securely when connected to an untrusted network. OpenVPN allows you to keep your online data safe by tunneling them through encrypted servers. It uses SSL/TLS for key exchange and capable of traversing network address translators.
The eManager can be configured either as VPN server or client thanks to the openvpn package. Below you can find all the details about how to do it.
1. eManager configured as an VPN client.
In this section will be detailed how to configure the eManager as an OpenVPN client and a Debian or Ubuntu device as an OpenVPN server.
1.1 Server configuration
Note
The server configuration process detailed below is compatible with Debian 10 and Ubuntu 20.04.
Step 1. Install OpenVPN
First, you will need to enable IP forwarding to forward network packets properly. You can do this by editing /etc/sysctl.conf file:
Change the following line:
Save and close the file, when you are finished.
Then, apply the new settings by running the following command:
Next, install OpenVPN package by just running the following command:
Step 2. Generate server certificate and key
First, you will need to copy the EasyRSA directory to /etc/openvpn/. You can do it with the following command:
Next, change the directory to easy-rsa and rename the vars.example file:
Then, open the vars file using nano vars and add the following lines:
export KEY_COUNTRY="SPAIN"
export KEY_PROVINCE="BCN"
export KEY_CITY="Viladecavalls"
export KEY_ORG="PickData"
export KEY_EMAIL="admin@example.com"
export KEY_OU="OpenVPN"
Save and close the file when you are finished. Then, initialize PKI with the following command:
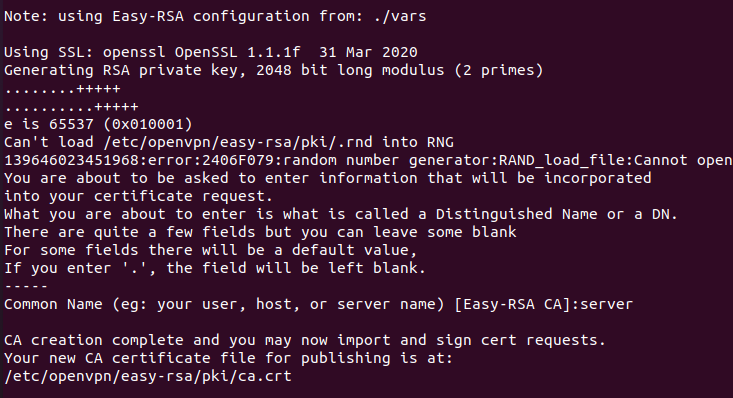
Next, build the CA without a password as shown below:
The output must be as shown in the image below.
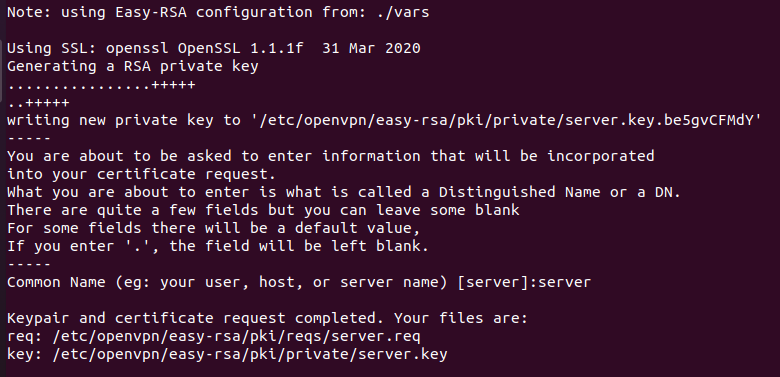
Next, generate the server key with the following command:
The output must be as shown in the image below.
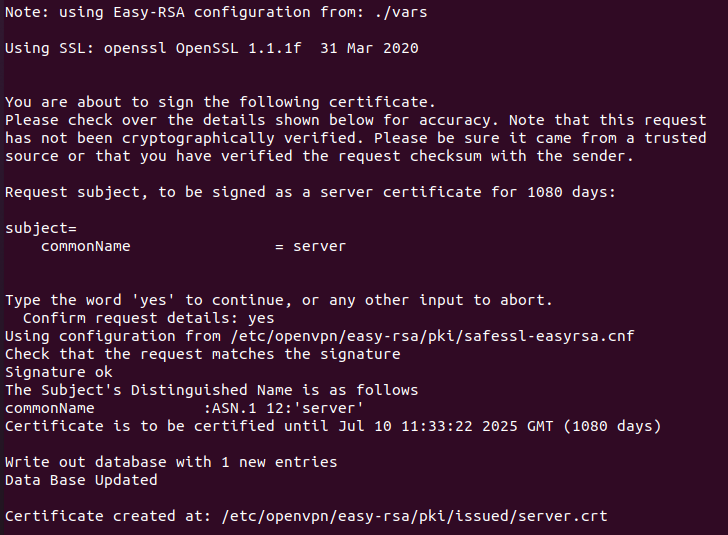
Next, sign the server certificate with the following command:
The output must be as shown in the image below.
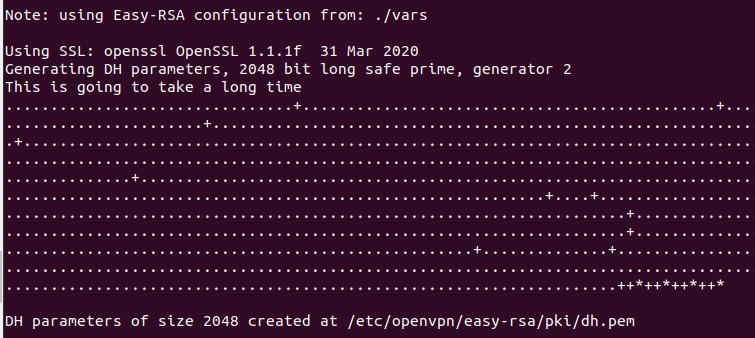
Next, build a Diffie-Hellman key exchange with the following command:
The output must be as shown in the image below.
Next, generate a HMAC signature with the following command:
Finally, copy all the certificate and key to the /etc/openvpn directory:
cp ta.key /etc/openvpn/
cp pki/ca.crt /etc/openvpn/
cp pki/private/server.key /etc/openvpn/
cp pki/issued/server.crt /etc/openvpn/
cp pki/dh.pem /etc/openvpn/
Step 3. Generate client certificate and key
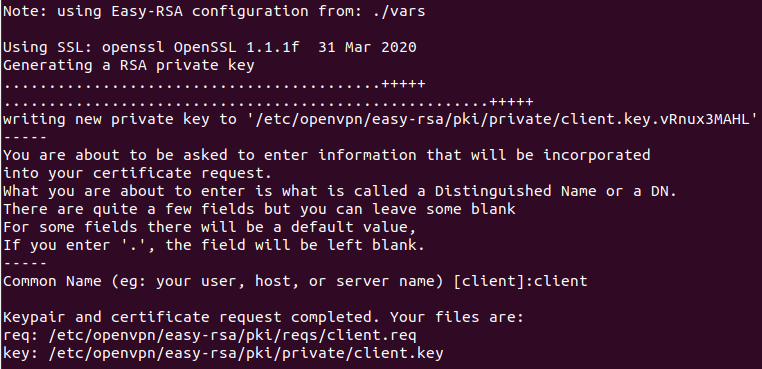
Next, generate client certificate with the following command:
You should see the following output:
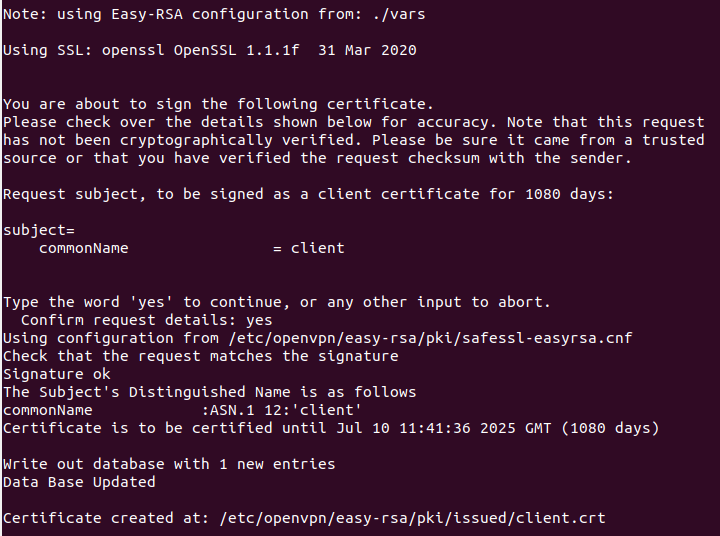
Next, sign the client certificate with the following command:
You should see the following output:
Next, copy all client certificate and key to /etc/openvpn/client/ directory:
cp pki/ca.crt /etc/openvpn/client/
cp pki/issued/client.crt /etc/openvpn/client/
cp pki/private/client.key /etc/openvpn/client/
Note
You must generate as many certificates as clients you want to connect to the same server.
Step 4. Configure OpenVPN server
All the required certificate and key for server and client are now generated. Next, you will need to create an OpenVPN configuration file. You can create it with the following command:
Add the following content:
port 1194
proto udp
dev tun
ca ca.crt
cert server.crt
key server.key  # This file should be kept secret
dh dh.pem
server 10.8.0.0 255.255.255.0
push "redirect-gateway def1 bypass-dhcp"
push "dhcp-option DNS 208.67.222.222"
push "dhcp-option DNS 208.67.220.220"
keepalive 10 120
tls-auth ta.key 0 # This file is secret
cipher AES-256-CBC
user nobody
group nogroup
persist-key
persist-tun
status /var/log/openvpn/openvpn-status.log
log         /var/log/openvpn/openvpn.log
log-append  /var/log/openvpn/openvpn.log
verb 3
explicit-exit-notify 1
Save and close the file. Then, restart OpenVPN service with the following command:
1.2 Client configuration
To install the OpenVPN in your eManager you can use the following commands:
To configure OpenVPN client, VPN service provider must give us the client certificates, server key and server IP.
The required files are shown below:
Step 1. Create OpenVPN configuration directory
Step 2. Edit OpenVPN configuration file
Define your server IP address and client certificate file as shown below:
client
dev tun
proto udp
remote <VPN_SERVER_IP> 1194
resolv-retry infinite
nobind
user nobody
group nogroup
persist-key
persist-tun
ca /etc/openvpn/ca.crt
cert /etc/openvpn/client.crt
key /etc/openvpn/client.key
remote-cert-tls server
tls-auth /etc/openvpn/ta.key 1
cipher AES-256-CBC
verb 3
Replace <VPN_SERVER_IP> by provider server public IP.
Note
This public IP of the server is the one that will be used for the connection between client and server.
Save and exit: Ctrl+X. Confirm save with Y.
Step 3. Copy client certificates files to eManager
Copy following files:
to the /etc/openvpn/ directory, inside the eManager.
Step 4. Restart OpenVPN client service
Now, you can see the new IP address assigned by OpenVPN server with the following command:
The output should be something similar as in the following image.
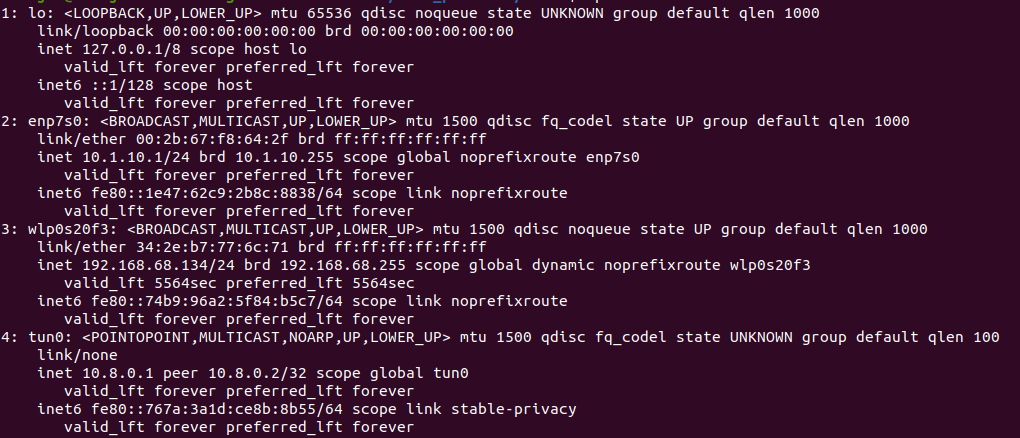
Note
New interface tun0 should now appear in the interfaces list.
You can also check OpenVPN log:
2. eManager configured as an VPN Server
As the eManager can be configured either as VPN server or client, in this section will be detailed how to configure it for each option.
Note
A device with Ubuntu 20.04 or Debian 10 will be needed to generate the keys, as in the previos section.
2.1 Server configuration
Step 1. Install OpenVPN
To install the OpenVPN in your eManager you can use the following commands:
Step 2. Generate server certificate and key
Follow the process detailed for Debian 10 & Ubuntu 20.04.
Keys and certificates must be generated in a Debian 10 or Ubuntu 20.04 operating system, and copied into eManager /etc/openvpn folder.
Step 3. Generate client certificate and key
Follow the process detailed for Debian 10 & Ubuntu 20.04.
Step 4. Configure OpenVPN server
In the server.conf file, the content must be the following:
port 1194
proto udp
dev tun
ca ca.crt
cert server.crt
key server.key  # This file should be kept secret
dh dh.pem
server 10.8.0.0 255.255.255.0
push "redirect-gateway def1 bypass-dhcp"
push "dhcp-option DNS 208.67.222.222"
push "dhcp-option DNS 208.67.220.220"
keepalive 10 120
tls-auth ta.key 0 # This file is secret
cipher AES-256-CBC
user nobody
group nogroup
persist-key
persist-tun
status /var/log/openvpn-status.log
log         /var/log/openvpn.log
log-append  /var/log/openvpn.log
verb 3
explicit-exit-notify 1
2.2 Client configuration
You can configure eManager as a client as explained here.
WireGuard
1. Server configuration
Note
The server configuration process detailed below is compatible with Debian 10 and Ubuntu 20.04.
Step 1. Install WireGuard
First, you will need to enable IP forwarding to forward network packets properly. You can do this by editing /etc/sysctl.conf file:
Change the following line:
Note
If you are using IPv6 add net.ipv6.conf.all.forwarding=1 at the bottom of the file.
Save and close the file, when you are finished. Then, apply the new settings by running the following command:
Next, install WireGuard package by just running the following command:
Step 2. Generating server private and public keys
To get started with generating the keys for the server, generate a new key pair with the command below:
wg genkey | sudo tee /etc/wireguard/private.key
sudo chmod go= /etc/wireguard/private.key
sudo cat /etc/wireguard/private.key | wg pubkey | sudo tee /etc/wireguard/public.key
Step 3. Generate server config
First, choose an IPv4 or IPv6 address. Any of the following ranges of private IPv4 addresses can be used:
- Class A: 10.0.0.0 to 10.255.255.255 (10/8 prefix)
- Class B: 172.16.0.0 to 172.31.255.255 (172.16/12 prefix)
- Class C: 192.168.0.0 to 192.168.255.255 (192.168/16 prefix)
In this example, we'll use 10.8.0.1/24.
The config files are generally stored in /etc/wireguard folder. Create a new configuration file called wg0.conf in that folder:
Add the following directives to the configuration file:
[Interface]
PrivateKey = <base64_encoded_server_private_key>
Address = 10.8.0.1/24
ListenPort = 51820
SaveConfig = true
You can get the <base64_encoded_server_private_key> using sudo cat /etc/wireguard/private.key on the server.
Step 4. Start WireGuard
You can use the following commands:
sudo systemctl enable wg-quick@wg0.service
sudo systemctl start wg-quick@wg0.service
systemctl status wg-quick@wg0.service
2. Client configuration
To install WireGuard in your eManager you can use the following commands:
Step 1. Generating client private and public keys
To get started with generating the keys for the client, generate a new key pair with the command below:
mkdir ~/client_keys
wg genkey | tee ~/client_keys/private.key
chmod go= ~/client_keys/private.key
cat ~/client_keys/private.key | wg pubkey | tee ~/client_keys/public.key
Step 2. Generate client config
Create a new configuration file in the /etc/wireguard directory:
Then, replace the content file with the following:
[Interface]
Address = 10.8.0.2/24
PrivateKey = <base64_encoded_client_private_key>

[Peer]
PublicKey = <base64_encoded_server_public_key>
Endpoint = <server-ip>:51820
AllowedIPs = 10.8.0.0/24
You can get the <base64_encoded_client_private_key> using cat ~/client_keys/private.key on the client.
The <base64_encoded_server_public_key> can be found at sudo cat c/wireguard/public.key on the server.
Step 3. Start WireGuard
You can use it to start your configuration using the following command:
If you want to start the service each time the eManager is turned on, use sudo systemctl enable wg-quick@wg0.
Step 4. Add Peer's public key to the Wireguard server
To do so, you need to execute the following command in the Wireguard server:
sudo wg set wg0 peer <base64_encoded_client_public_key> allowed-ips 10.8.0.2
systemctl restart wg-quick@wg0.service
You can get the <base64_encoded_client_public_key> using:
on the client.