eManager Setup
Ethernet
Ethernet network configuration file is stored in /etc/systemd/network/20-eth0.network. You can configure static and dynamic IP address, and also combined configuration. Edit this file according to the settings you need:
Static IP address configuration
[Match]
Name=eth0
[Network]
Address=10.1.10.10/24
Gateway=10.1.10.1
DNS=10.1.10.1
Dynamic IP address configuration
[Match]
Name=eth0
[Network]
DHCP=yes
[DHCP]
RouteMetric=100
Combined configuration
[Match]
Name=eth0
[Network]
DHCP=yes
LinkLocalAddressing=yes
LLMNR=yes
MulticastDNS=yes
LLDP=yes
EmitLLDP=yes
DNS=10.1.10.1
[Address]
Address=10.1.10.10/24
[Route]
Gateway=10.1.10.1
Metric=400
[DHCP]
RouteMetric=100
For further information: systemd.network
After configure, service must be restarted:
systemctl restart systemd-networkd
Finally, check if IP address is correctly assigned using command:
ip addr
Wifi
Wifi network configuration file is stored in /etc/systemd/network/21-wlan0.network. You can configure Wifi as STA or AP mode.
Important
Wifi can work in only one mode at a time, so to change from one to another it is necessary to disable the one that is not used.
STA mode
This is a step-to-step guide for connecting to a WPA/WPA2 WiFi network. Used tools are:
- iw is the basic tool for WiFi network-related tasks, such as finding the WiFi device name, and scanning access points
- wpa_supplicant is the wireless tool for connecting to a WPA/WPA2 network
- systemctl is a tool to control the Linux systemd system and services
- ip is used for enabling/disabling devices, and finding out general network interface information
Steps:
1. Edit Wifi configuration file
nano /etc/systemd/network/21-wlan0.network
Replace content with following lines:
[Match]
Name=wlan0
[Network]
DHCP=yes
LLMNR=yes
MulticastDNS=yes
LLDP=yes
EmitLLDP=yes
[DHCP]
RouteMetric=200
Save and exit: CTRL + X. Confirm save with Y
2. Restart service
systemctl restart systemd-networkd
3. Scan to find out what WiFi network(s) are detected
iw wlan0 scan
To see only SSIDs
iw wlan0 scan | grep SSID
4. Generate a configuration file
You must generate a configuration file for wpa_supplicant that contains the pre-shared key ("passphrase") for the WiFi network.
wpa_passphrase takes the SSID as the single argument. You must type in the passphrase for the chosen WiFi network after you run the command. Using that information, wpa_passphrase will output the necessary configuration statements to the standard output. Those statements are appended to the wpa_supplicant configuration file located at /etc/wpa_supplicant.conf.
wpa_passphrase 'chosen SSID' >> /etc/wpa_supplicant/wpa_supplicant-wlan0.conf
type the passphrase and hit enter
Now, you can view generated statements:
cat /etc/wpa_supplicant/wpa_supplicant-wlan0.conf
5. Start wpa_supplicant service to connect to WPA/WPA2 WiFi network
systemctl start wpa_supplicant@wlan0.service
If you need to connect automatically at each startup, you must enable the service
systemctl enable wpa_supplicant@wlan0.service
6. Check the connection status and assigned IP address
iw wlan0 link
ip a | grep wlan0
For further information: systemd.network
AP / hotspot mode
Steps:
1. Edit Wifi configuration file
nano /etc/systemd/network/21-wlan0.network
Replace the section [Network] by:
[Network]
Address=192.168.0.1/24
DHCPServer=yes
IPForward=no
IPMasquerade=no
Save and exit: CTRL + X. Confirm save with Y
2. Restart service
systemctl restart systemd-networkd
3. Edit hostapd Wifi configuration file
nano /etc/hostapd.conf
Replace the following lines (set desired Wifi password instead of eMANAGER-password. It must have a minimum of 8 characters):
logger_syslog=-1
logger_syslog_level=2
logger_stdout=-1
logger_stdout_level=2
ctrl_interface=/var/run/hostapd
ctrl_interface_group=0
auth_algs=1
beacon_int=50
channel=3
country_code=ES
disassoc_low_ack=1
driver=nl80211
hw_mode=g
ieee80211d=1
ieee80211n=1
interface=wlan0
require_ht=0
rsn_pairwise=CCMP
ssid=eMANAGER
wmm_enabled=1
wpa=2
wpa_key_mgmt=WPA-PSK
wpa_passphrase=eMANAGER-password
Save and exit: CTRL + X. Confirm save with Y
4. Set service at startup and start it
systemctl enable hostapd
systemctl start hostapd
5. Connect client via Wifi
Modem
Steps:
1. Configure the APN
Create network operator filename and fill in the APN name. For example, apn.EXAMPLE.
echo 'AT+CGDCONT=1,"IP","operator_apn"' > /etc/ppp/chatscripts/apn.EXAMPLE
Assign the apn symbolic link to point to the newly created file
ln -sf /etc/ppp/chatscripts/apn.EXAMPLE /etc/ppp/chatscripts/apn
If the APN requires a user and password, you need:
1.1. Edit mobile-auth file to define user and password
nano /etc/ppp/peers/mobile-auth
Save and exit: CTRL + X. Confirm save with Y
1.2. Point provider to mobile-auth file
ln -sf /etc/ppp/peers/mobile-auth /etc/ppp/peers/provider
2. Configure the SIM PIN
If SIM needs PIN code, create pin code file with the correct PIN
echo 'AT+CPIN=1234' > /etc/ppp/chatscripts/pin.CODE
Assign the pin symbolic link to point to the newly created file
ln -sf /etc/ppp/chatscripts/pin.CODE /etc/ppp/chatscripts/pin
If SIM doesn’t require PIN code, assign the pin symbolic link to pin.NONE
ln -sf /etc/ppp/chatscripts/pin.NONE /etc/ppp/chatscripts/pin
3. Start ppp service to connect to mobile network
systemctl start ppp@provider.service
If you need to connect automatically at each startup, you must enable the service
systemctl enable ppp@provider.service
4. Check the connection status and assigned IP address
ip a | grep ppp0
RS232/RS485
The following devices must be used to communicate via serial ports:
- RS485: /dev/ttymxc4
- RS232: /dev/ttymxc5
Leds
You have two RGB LEDs available so you can configure according to your needs. They are mapped in the /sys/class/leds/ directory.
Timezones
To set the coordinated universal time (UTC)
timedatectl set-timezone UTC
To set the Santiago de Chile zone
timedatectl set-timezone America/Santiago
To show the available timezones
timedatectl list-timezones
To set new time
timedatectl set-time '2020-01-01 00:00'
Flash partition safe to system updates
To protect the data against system updates and prevent accidental loss, /data partition has been reserved. Therefore, the permanent data we want to keep should go in this partition.
The /data partition is 5GB in size, and is only available in eManager Pro.
Node-RED
By default, node-RED is running inside eManager.
First flow
To access the editor, you only need to put URL 10.1.10.1880 in a browser. Then, if you want to create your first flow, you can start with the second point of the following tutorial:
Palette Manager
You have thousands of nodes available so you can use Node-RED according to your needs. To manage the nodes, you can follow the following manual:
NOTE: The installation of the nodes in the Palette Manager can take 2 or 3 minutes, until they appear.
Modbus package
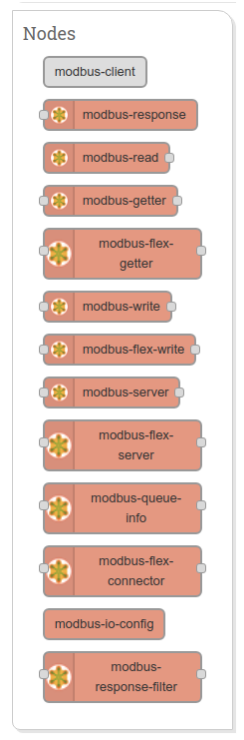
eManager Node-RED incorporates the following Modbus TCP and Serial node package: Modbus package
How to use:
- See Wiki pages
- Use the Flow example to see how it works...
- See YouTube tutorials
Access security for Node-RED
Steps:
1. Generate the hash for the password
node-red-admin hash-pw
When it asks for the password, enter the desired password to access the Node-RED.
2. Edit Node-RED configuration file
nano /etc/node-red/settings.js
Add the following content as an option inside module.exports (change the username and password you want):
adminAuth: {
type: "credentials",
users: [{
username: "admin",
password: "<GENERATED HASH>",
permissions: "*"
}]
},
Copy the hash generated in step 2 into <GENERATED HASH>.
3. Restart service
systemctl restart node-red
Wait a few seconds for the service to restart and access from a browser in the client connected to eManager.
OpenVPN
To configure openvpn client, VPN service provider must give us the client certificates, server key and server IP.
The required files are shown below:
ca.crt
client.crt
client.key
ta.key
Steps:
1. Create openvpn configuration directory
mkdir /etc/openvpn/
2. Edit openvpn configuration file
nano /etc/openvpn/client.conf
Define your server IP address and client certificate file as shown below:
client dev tun proto udp remoteVPN_SERVER_IP1194 resolv-retry infinite nobind user nobody group nogroup persist-key persist-tun ca ca.crt cert client.crt key client.key remote-cert-tls server tls-auth ta.key 1 cipher AES-256-CBC verb 3
Replace VPN_SERVER_IP by provider server IP.
Save and exit: CTRL + X. Confirm save with Y
3. Copy client certificates files to eManager****
Copy following files:
ca.crt
client.crt
client.key
ta.key
to the /etc/openvpn/ directory, inside eManager.
4. Start openvpn client service
systemctl start openvpn@client
Now, you can see the new IP address assigned by OpenVPN server with the following command:
ifconfig
You can also check OpenVPN log:
tail -f /var/log/openvpn/openvpn.log